How to set up Facebook Pixel
Facebook Pixel is an awesome tool that can totally elevate your marketing practices.
The Pixel is a simple piece of code that helps you track conversions from your Facebook ads, optimize ads with the collected data, create custom audiences for future campaigns, and retarget customers that took some action on the website.
Setting up a Pixel is simple and can be done without any help from a developer. To help you through the process, we put together a step-by-step guide that will help you set up Facebook Pixel for your website.
Source: Pexels.com
Step 1: Create a Facebook Pixel
In Facebook Ads Manager, click “Connect to Data Sources” from the left menu. From the menu that appears, choose “Web” and click “Get Started”
Source: Hootsuite
In the next menu, select “Facebook Pixel” and click “Connect”.
Source: Hootsuite
Next, name your Pixel, enter the URL for your website, and click “Continue”. While naming your ad account, try to make the name represent your business rather than a specific campaign. This is recommended because you only get one Pixel per ad account.
Source: Hootsuite
Step 2: Add the Facebook Pixel code to the website.
In order for Facebook Pixel to work on your website, you need to install the Pixel code onto your website.
There are few methods to install the code depending on the website platform you use.
Source: Hootsuite
Method 1: Use a Partner Integration
If you use one of Facebook’s integration partners, such as WordPress or Squarespace you can choose this option. This method walks you through a series of steps to connect the Pixel, and there is no coding required.
Method 2: Email Instructions
If you work with a developer, this option will allow you to send all the information the developer will need to install the Pixel.
Method 3: Add Pixel Code Manually
This option lets you upload the code to your website manually. Since this method needs the most manual work, we underlined the steps you need to follow to complete the installation using this method.
How to manually install the Pixel code to the website.
Click on “Install Code Manually”.
Click on the green “Copy Code button”.
Source: Hootsuite
Paste the Pixel code in the header code between the <head> and </head> tags. You need to paste this code onto every page or into the header template if you’re using one.
The next menu is for Automatic Advanced Matching. This option matched customer data from your website to Facebook Profiles. Turning on this option can let you track conversions more accurately and create larger custom audiences.
Source: Hootsuite
Step 3: Set up Facebook Pixel Events.
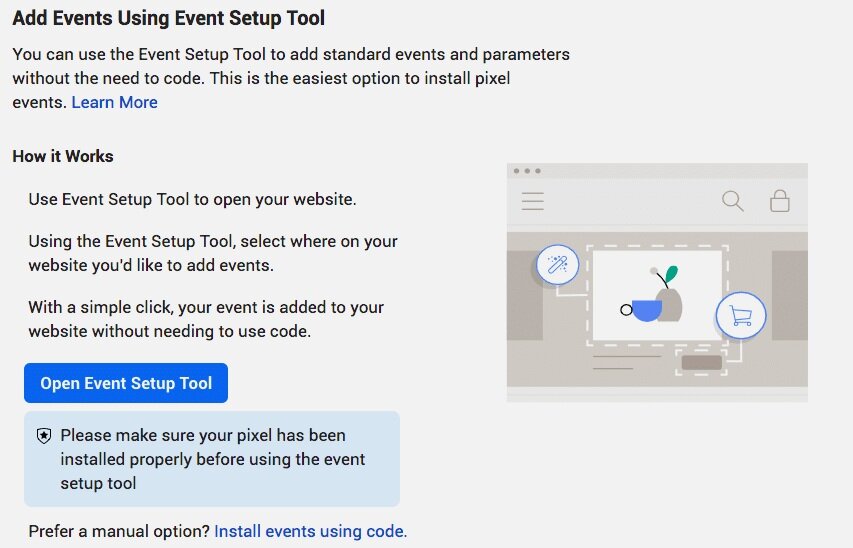
Click on “Open Event Setup Tool”.
Source: Hootsuite
Choose your Facebook Pixel ID. Once selected, go to setting, and under Event Setup click “Open Event Setup Tool”.
Source: Hootsuite
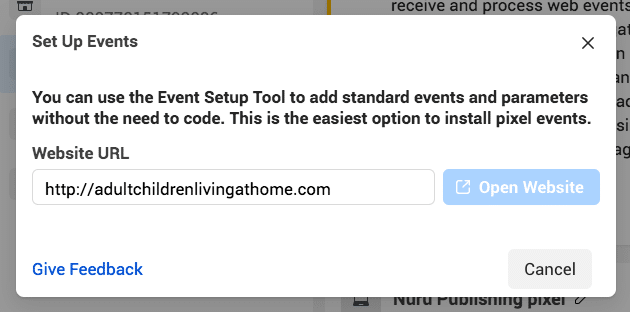
Fill in your website URL and click on “Open Website”
Source: Hootsuite
Facebook will give you a list of events. You can review each event, and choose if you want to “Confirm” or “Dismiss” the event. Click on “Finish Setup” to continue.
You can always resume setting up events by going to “Events Manager”.
Step 4: Install Facebook Pixel Helper to ensure the Pixel is working accurately.
Download and add the Facebook Pixel Helper extension to your chrome browser. You need to install Chrome to use the Pixel Helper since it’s not available on other browsers.
Source: Hootsuite
Go to the pages to which you installed the Pixel. The helper will pop up telling you if the Pixel is active and if it is functioning correctly. If not, it will tell you the error in the code so you can make the required corrections.
Source: Hootsuite
Step 5: Add a Facebook Pixel notice on your website.
As per Facebook’s terms, you need to let your website visitors know that you’re tracking and collecting their data. You need to notify the visitors that their data is collected using cookies and other methods. You also need to give the visitors the option to opt-out of having their data collected.
Want to know more about Facebook Advertising? Contact our expert team at Acquire today and let us help you take your marketing performance to the next level.
Acquire Agency is an official Facebook Marketing Partner, and we have helped countless businesses optimize their social media campaigns on Facebook+Instagram.
Sources:


